Tutorial for creating an icon for an Android button: Part 2 of 2
Sunday, January 25th, 2009 - 2:14 pm - Android
This is part 2 of this tutorial. Click here to see part 1.
- You should have two shapes in Inkscape.


- Now, you have to get these into the GIMP. The easiest way is to take a screen shot. To do that, in GIMP, go to File -> Acquire -> Screen Shot. Take two shots. Crop one to the shadowed image and the other to the black and white.
- Pick the shadowed image and add an opaque layer mask. View the Layers dialog. Right click the “Background” layer and click Add Layer Mask…
- Pick the black and white image. Select the entire image and copy it.
- Pick the shadowed image and in the layers dialog, click on the mask, to the right of the image.
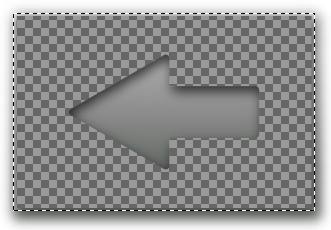
- Pick the shadowed image and paste. You should see something like the image below. Pick the move tool and drag the mask around until it exactly matches the shadowed arrow.

- Now, crop the image to the arrow shape.
- Right click on the floating layer and anchor it.
- Right click on the mask layer and apply it.
- Now, just save it! Remember to save it as a PNG so that the empty parts are transparent.

I hope this helps anyone else who needs more than the standard Android icons.
More updates:
Will S. created a wireless icon.
Great tutorial, and very easy to follow, thanks.
I made a wifi icon, which can be found here:
http://digitalsquid.co.uk/files/2009/08/wifiicon.png
(you can use it if you want)

Very useful tutorial. Inkscape is a great tool, however it takes some time to master it. The result is elegant.
However, did you try to apply the update suggested by Nick to obtain the whole arrow with Inkscape? I tried, and I think it doesn’t work. I think because the black and white arrow used to clip is partially white and partially transparent (the white line on white background is ok if you take a screenshot and copy to gimp; it doesn’t work if you clip directly from Inkscape).
Good guide. I know this is an old post, but I think you can do the whole thing in Inkscape without having to go into GIMP, by using a clip mask.
Duplicate your arrow, then select both this and the inverse arrow and do Object > Clip > Set. The inverse arrow will be clipped to only show the content contained within the arrow shape.
Hope that saves a bit of time for someone.
Great tip – thanks.
Nick,
The clipping object should be converted with “Stroke to Path” followed by deleting the inner path, otherwise the clipping would go through the middle of the stroke.
I appreciate your posting these steps. Really helped me out.
One thing I did differently was the screen shot step. I used Inkscape File -> Export Bitmap. Then I was able to set the destination resolution of the png file.
Great wonderful tutorial!!!
Hello, is the back button image you created freely usable in an Android application I am writing? I do plan to follow your tutorial to create some other icons.
Thank you.
Hi, thanks for the great tutorial. I learned a lot from following the advice and it will hopefully help me design an icon for my own app 😀
Thank you very much for sharing! Ill be getting to work right after I submit this comment!
This is exactly what I needed, thanx for using InkScape and GIMP, my two favorite tools for design stuff. Excellent tutorial!
Thanks a lot, i need to make some buttons for my ap, once i do them, i will provide link from here. Thanks a lot, your tutorial is a starting place for me.
Great tutorial, and very easy to follow, thanks.
I made a wifi icon, which can be found here:
http://digitalsquid.co.uk/files/2009/08/wifiicon.png
(you can use it if you want)